I'm still working away at some final few gifts, and I've got another ornament for you to try. I don't know why, but this little guy makes me think of a Muppet Santa... Is it just me?
You will need:
- 2 paintbrushes: one flat and one pointed
- White porcelain ornament
- Martha Stewart multi-surface paint in:
- Some skin tone color (I used a mix of Gold Mother of Pearl and Brushed Bronze)
- Holly Berry (pearl finish)
- Putting Green (pearl finish)
- Sterling (metallic finish)
- Beetle Black (satin finish)
- Martha Stewart glass paint in Garnet glitter finish
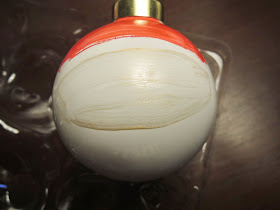
First, paint on a red semicircle near the top of the ornament. This will be Santa's hat.
Next, leaving a small gap below the hat, paint on Santa's face in a football shape.
Then, take your pointed brush and outline a silver beard starting at the face and making a curved base below. To make Santa's mustache, just paint a wide "W" If you'd like, add in a few straight lines at the bottom of the beard to add a little texture.
Next, take your silver and trace the space between Santa's face and his hat; this will be the fur trim on his hat!
If you need to, add a second coat of any of your colors until the white doesn't show through.
Finally, add the finishing details: two little black dots for his eyes, a red semi circle for his nose, and dots of red glitter and green to make a sprig of holly on his hat.
If you want, add a little silver circle to be a pom at the end of his hat.
I think he's pretty cute!
So, are you done with your Christmas shopping?


Christmas ornaments can get expensive, so instead of buying some new ornaments why not make some? Its more special of having your family members get together and make some Christmas tree ornaments together. HG Nadel
ReplyDelete